Prerequirements: Windows 2008/Vista, IIS7, FastCGI, Helicon Ape
Step 1. MySQL
After MySQL installation run MySQL Command Line Client and execute the following command:create database wordpress;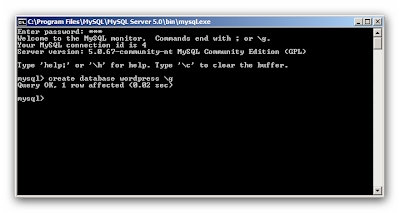
Step 2. PHP
Install PHP intoC:\inetpub\php to inherit NTFS permissions of IIS directory. It is of importance that C:\inetpub\php\php.ini contained the following directives:magic_quotes_runtime = Off
extension_dir = "C:\inetpub\php\ext\"
extension=php_mysql.dll- open IIS Manager
- open Handler Mappings snap-in

- press 'Add Module Mapping' and fill the fields in the opened window in accordance with the next screenshot (all images are clickable)

Step 3. Wordpress
Download the latest Wordpress version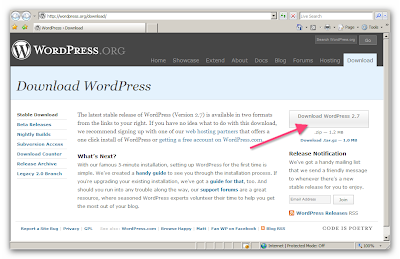
Unzip the package into
C:\inetpub\wwwroot\wordpressRename
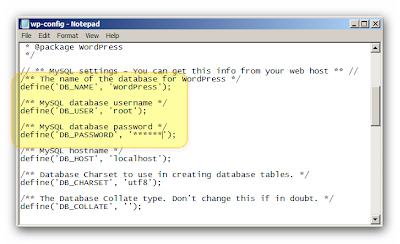
wp-config-sample.php into wp-config.php.Adjust MySQL connection:
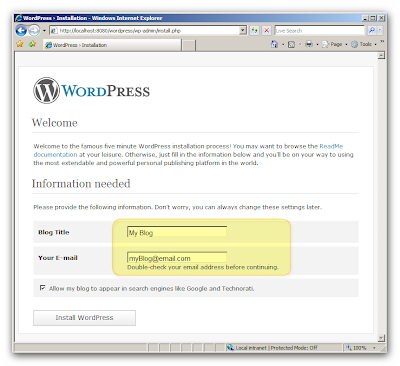
Create a blog
Now in Administrative panel you can set SEO-friendly format for your links, e.g:
/%post_id%/%postname%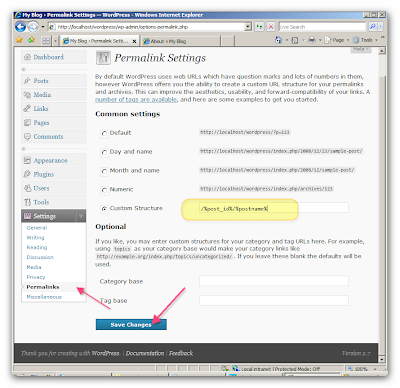
Your links will now look like
http://localhost/wordpress/2008/uncategorized/hello-worldinstead of
http://localhost/wordpress/?p=123. If you now attempt to access any of the pages on your blog, 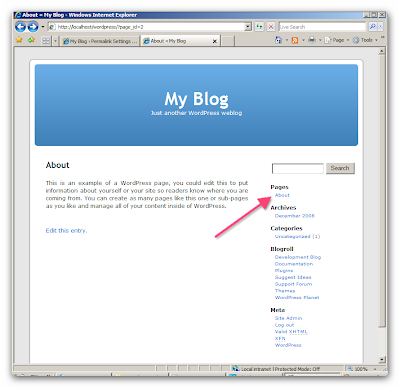
you'll get 404 Not Found error
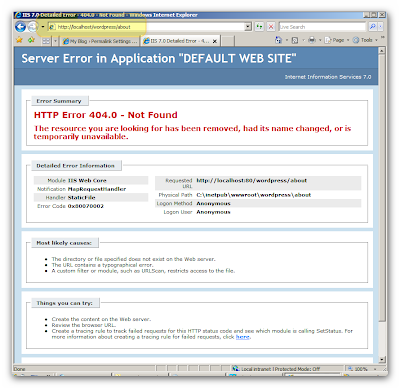
And that is defenitely not the desired result!
Step 4. Helicon Ape
It's time to fix the above inconveniences and accelerate Wordpress.We'll use the following Helicon Ape modules:
4.1 mod_rewrite
It'll assist us in handling SEO-friendly URLs.Open Helicon Ape Manager and uncomment/add the following line in httpd.conf to enable mod_rewrite:
LoadModule rewrite_module modules/mod_rewrite.so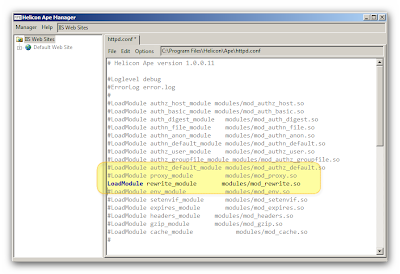
Now in Helicon Ape Manager browse to Wordpress folder and put the following code to .htaccess:
RewriteEngine On
RewriteCond %{REQUEST_FILENAME} !-f
RewriteCond %{REQUEST_FILENAME} !-d
RewriteRule . index.php [NC,L]
Save changes to .htaccess. Request any blog page once again... It works!
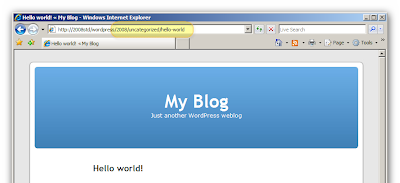
Yes, it does... but not the best way... So we are moving on! 'Cause only the best is good enough:)
4.2 mod_expires: client/proxy content expiration
With this module we'll adjust browser cache so that the browser doesn't send excess requests to the server. Go back to httpd.conf in Helicon Ape Manager and uncomment/add the following line:LoadModule expires_module modules/mod_expires.so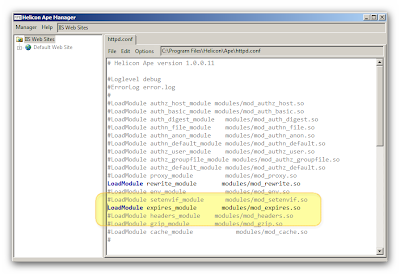
Subsequent lines (being put to .htaccess) will tell browser cache that images, css and JavaScripts must not be requested from the server (but rather taken from cache) within 1 day after retrieving resource for the first time:
ExpiresActive On
ExpiresByType image/jpeg "access plus 1 days"
ExpiresByType image/gif "access plus 1 days"
ExpiresByType text/css   "access plus 1 days"
ExpiresByType application/x-javascript  "access plus 1 days"
Let's check what's changed. The first request grabs all page resources and for each image, css and JavaScript sets the header
Cache-Control: max-age=86400
Upon consequent requests to that page the browser does not ask for images, css and JavaScripts from the server but takes them from the cache until max-age expires.

4.3 mod_gzip
Are you enjoying the process? Then let's implement the next stage. To make things even better, let's apply on-the-fly compression that will reduce traffic and speed up page load. In our irreplaceable Helicon Ape Manager please uncomment/add the following line inside httpd.conf:LoadModule gzip_module modules/mod_gzip.somod_gzip_on yes
mod_gzip_item_include Mime ^text/.*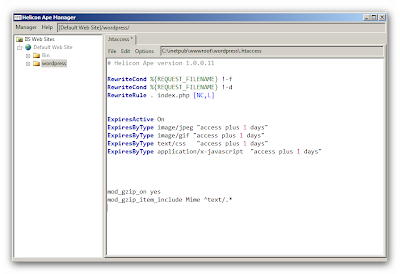
Uncompressed page had
Content-Length: 5152, the same page after compression became as small as Content-Length: 2168. So, we've managed to reduce the amount of info to be transferred almost twice.
4.4 mod_cache
We are coming to the final and in conclusion we'll enable server-side caching. Instead of requesting the same page from the server again and again Helicon Ape saves the copy of server response and fires with it when corresponding page is needed.Uncomment/add the following line in httpd.conf (using Helicon Ape Manager):
LoadModule cache_module modules/mod_cache.soNote! It is worth mentioning that cache distinguishes query string parameters, thus it will store different snapshots for different blog pages.
There are some shortcomings of this type of caching (semi-dynamic web application). E.g. if the user posts a comment on the blog, it will see the result (his post) immediately, but another user browsing this page will only see it in 30 seconds (after cache expires). This issue may be resolved by reducing the time snapshot lives in cache, but it should nevertheless be taken into account.
Put the following lines into .htaccess in Wordpress folder:
<Files index.php>
ExpiresByType "text/html; charset=UTF-8" A30
CacheEnable mem
CacheVaryByHeaders Original-Url
</Files>
Let us compare the productivity with and without cache. On our testing virtual machine we've obtained the following values:
4.5 mod_headers
The last drop we want to add to our Wordpress-based dish will hide IIS from robots and scanners.You need to uncomment/add the following line in httpd.conf:
LoadModule headers_module modules/mod_headers.soHeader set Server "Apache/2.2.9 (Unix)"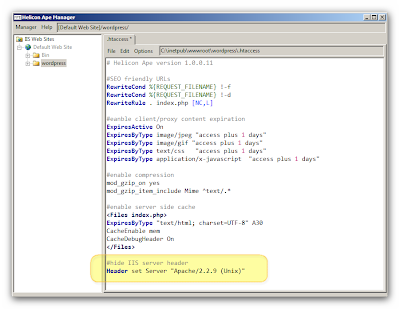
Now our IIS appears to the world like

Congratulations to everyone who came to finish! It's all done now! Enjoy flawless and fast Wordpress operation and stay with us!
Best regards,
Helicon Team.


